Author Archives: Ken

Knot Tying

Knot tying is an essential skill for any outdoors enthusiast. Whether you’re a camper, hiker, sailor or wilderness survivalist, knowing how to tie knots can be invaluable in many situations. There are countless types of knots used for different purposes and a variety of materials that can be used depending on the task at hand.

For camping and hiking trips, knowing the basics of knot tying can come in handy for setting up shelters and securing objects around camp such as tarps and sleeping bags. A few examples of useful camping knots include square knots, sheet bends and clove hitches. Square knots are great for securely joining two ropes together while sheet bends are useful when connecting one rope to another with different diameters. Clove hitches are versatile and can be used for attaching a rope to a pole or stake.

If you’re a boater, then it goes without saying that knot tying is an absolute must-have skill. From anchoring your boat securely to the shoreline to repairing sails and rigging, there’s no shortage of tasks where knot tying comes in handy. Boaters should become familiar with useful knots such as the bowline, figure eight and sheet bend. The bowline is one of the most important and versatile knots anyone can learn because it can be used in many different scenarios from raising flags to securing sails. Figure eights are great for temporarily stopping a rope from running through pulleys or rings while sheet bends come into play when connecting lines of different thicknesses.

No matter what activity you’re into, knot tying is a valuable skill to have in your arsenal and even the most basic knowledge can go a long way. Take some time to learn the basics and practice with different types of rope until you feel confident in your ability. A few simple knots could end up saving you a lot of time, energy or maybe even your life!

FM 21-76 Army Field Manual

The FM-21-76 army field manual was first released in 1975. It was developed by the Department of the Army to provide standardized guidance for everyday military operations and procedures. The manual covered a variety of topics, including leadership, tactics, equipment maintenance, and medical care. It was intended to be used as a reference guide by soldiers during their day-to-day operations.

The manual was revised several times throughout the late 1970s and early 1980s, with each new update refining and expanding upon the existing information. In particular, the 1983 version of the manual addressed many of the shortcomings with earlier versions, implementing changes to cover items such as nuclear warfare and urban combat.

With the dissolution of the Soviet Union in 1991, a new edition of FM-21-76 was released. This version added more emphasis on counterinsurgency tactics and included detailed information on patrolling, combat psychology, and operational planning.

The manual has been updated several times since then to reflect changing conditions and technology advancements. Today, the FM-21-76 is widely used by the US Army and its allies as a reference for modern military operations. It continues to serve as one of the most comprehensive resources available for training and guidance in military operations.

In addition to its utility in day-to-day operations, the FM-21-76 has also been used as a reference for military history and research. Its contents are regularly used in books, articles, and other media to provide background information on various aspects of modern military operations. This helps ensure that the manual remains an invaluable tool for both soldiers and historians alike.

Overall, the FM-21-76 army field manual has been a major contributor to the US military’s success over the past several decades. Its comprehensive contents provide invaluable guidance and direction in modern warfare, while its emphasis on survival and medical care has helped save countless lives. As such, it continues to be a vital resource for both military officers and civilians alike.

DEET For Use as Mosquito Repellant

DEET is a synthetic chemical that has been used for many years as an effective mosquito repellent. It is used in products such as insect sprays, lotions, and creams to keep mosquitoes away from the skin. DEET works by blocking the signals that female mosquitoes use to find and detect humans as their blood source.

The benefits of using DEET as a mosquito repellant are clear: it is highly effective at keeping mosquitos from biting and potentially transmitting disease-causing viruses or parasites. However, although DEET is considered safe when used appropriately, there are still some risks associated with its use. Prolonged exposure may cause irritation or burning sensations on the skin and eyes, and there have been rare reports of neurological symptoms associated with frequent or excessive use.

In order to make sure you reap the benefits of DEET without running any unnecessary risks, it’s important to follow the label instructions when using products that contain this chemical: apply sparingly and in a well-ventilated area, don’t use under clothing, and wash off after returning indoors. Additionally, be aware that DEET is most effective at repelling mosquitoes when used in concentrations of 20-30%. Anything above 50% will not increase its effectiveness against mosquitos but may increase your risk for irritation or other side effects.

Giardia

Giardia is a microscopic parasite that can potentially cause gastrointestinal illness. It is found in water sources such as lakes, streams, and rivers, and can also be transmitted from person to person through contact with feces. Symptoms of giardiasis include diarrhea, abdominal cramps and pain, nausea, dehydration, fatigue, weight loss, and greasy stools.

If you’re a hiker, camper, or someone who plans to visit areas with potentially contaminated water sources, it is important to take precautions by purifying your drinking water. Some methods of purification include boiling the water before use, using chemical treatments like iodine and chlorine dioxide tablets, and filtering it with specialized water filters.

The survival of humans in the wild depends on access to clean, safe drinking water. But if you’re stuck in an area with contaminated water sources, it is important to take the necessary steps to protect yourself from giardia and other potentially dangerous parasites. Remember that boiling, chemical treatments, and filtering can all help to purify the water and reduce your risk of becoming ill. With proper preparation and safety precautions, you can ensure a safe and successful outdoor experience.

Purifying Stream Water for Drinking

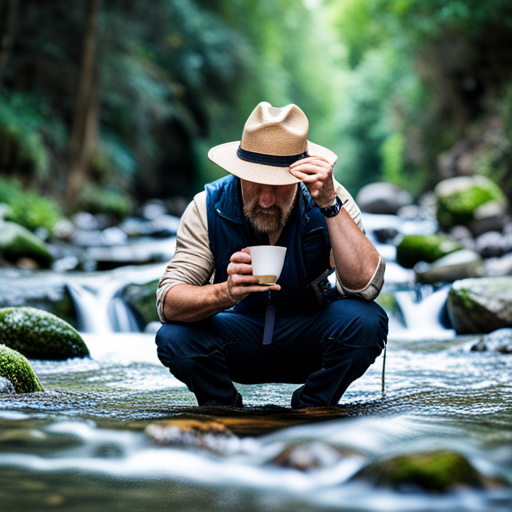
Purifying water from a stream can be essential in many situations, such as camping, hiking, or in a survival situation. It is important to ensure that the water is safe to drink and free from contaminants. There are several methods available for purifying water from a stream, including boiling and using a filter.

Boiling is one of the most effective ways of purifying drinking water from streams and can be done easily on-site with basic equipment such as a kettle or pot. It’s important to note that boiling water does not remove heavy metals and other contaminants that may be found in the water, but does kill dangerous bacteria such as giardia. To boil water, fill your container with clear stream water and bring it to a rolling boil for at least five minutes. Once cooled, the boiled water should then be stored in clean containers and consumed within 24 hours. It may also be a good idea to filter the water after it’s boiled.

A second way of purifying stream water is by using a filter. Some of the most popular options are gravity filters and pump filters, which both work by removing contaminants from the water as it passes through them. Gravity filters can be quite slow but have the advantage of needing no power source and being easy to use. Pump filters are much faster but require batteries or access to a power source such as solar panels for operation. It’s important to note than many filters do not remove bacteria without the addition of a chemical additive such as chlorine.

Chemical purification is also an option for purifying drinking water from streams and can be used in conjunction with boiling and filtering your water. Chemical purification works by adding a small amount of chlorine-based solution such as bleach or iodine into the water which then kills any bacteria present in the stream water. However, this method should not be used on its own and should always be accompanied by other methods such as boiling or filtration to ensure the maximum level of safety.

In summary, there are a few ways to purify water from a stream for drinking including boiling, using a filter and chemical purification. It is important to make sure that you use all available methods when collecting and treating water from streams to ensure it is safe for consumption. This will help reduce your risk of becoming ill from contaminated drinking water.

Identifying Poison Ivy

One of the most common plants in North America that can cause an irritating rash is poison ivy. It has three leaflets and is characterized by its shiny, green leaves with a reddish tinge. Identifying this plant is important in order to avoid coming into contact with it.

It is helpful to look for other identifying features to ensure that you have correctly identified poison ivy. The stems of the plant are hairy and may be covered in a white waxy substance known as urushiol (pronounced oo-roo-shee-all). The vines may also contain small clusters of yellow or cream colored berries which hang from the stem. In addition, poison ivy can also grow as a bush or low shrub with several stems.

When attempting to identify poison ivy, it is important to be aware that the plant can take many shapes and forms. It may grow as a vine, bush, or shrub and often grows in tangled clusters. In addition, poison ivy can also spread across the ground as a creeping vine if there is nothing nearby for it to climb on.

It is also important to remember that all parts of the plant contain urushiol and thus are capable of causing an allergic reaction. For this reason, it is important to stay away from any unidentified plants that you come into contact with in order to avoid coming into contact with poison ivy. If you think you have been exposed to poison ivy, it is important to wash the affected area with warm water and soap as soon as possible.

To help identify poison ivy, pay attention to its leaves. The most common type of leaf for this plant has three leaflets that branch from one stalk. There may also be more than three leaflets; however, they will still be in groups of two or three on each stem. In addition, the edges of the leaves may have a serrated or jagged appearance.

Another way to distinguish poison ivy from harmless plants is by looking at its berries. Poison ivy’s berries are small and whitish-green in color and typically found in clusters near the top of the plant. They usually appear during the spring season but can remain on the plant all year round.

The final way to identify poison ivy is by its stem. Its stems will have a reddish tint and tend to be hairy or fuzzy. The bark may also appear raised, bumpy, or scaly in texture.

Although these are the primary ways to identify poison ivy, other potential signs of this plant include its flower clusters appearing yellowish-green in color and its leaves turning red during certain seasons of the year. It is often one of the first leaves to turn red during the fall. This is helpful for remembering the location come spring, but the plant can give the itchy rash all year long if you happen to handle it. Cutting down trees during the winter months can still give you poison ivy from the vines wrapped around the tree if you’re handling the logs.

If you come into contact with any part of poison ivy, it’s important to rinse off immediately with hot water and soap. Also, avoid touching any infected areas if possible as the poisonous oil from the plant can spread easily. If you think that you have been exposed to poison ivy, seek medical attention right away to ensure proper treatment.

If you’re planning to spend time outdoors, it’s a good idea to familiarize yourself with the appearance of poison ivy so that you can identify and avoid it. By doing this, you can minimize your risk of exposure and enjoy the great outdoors safely!

How to Find BLM Land

If you’re looking to explore the U.S. and spend time on BLM land, there are several resources available to help you find just what you need. Here are some tips for finding BLM land that suits your needs:

1. Check online maps – Using an online map like Google Maps, you can search for BLM land in your area. Look for land that is managed or owned by the Bureau of Land Management, and zoom in to find more details about what type of recreational activities are available on each parcel.

2. Find out what kind of activities you can do – Different types of BLM land allow for different kinds of recreational activities. For example, some land may be open for hunting, while others allow camping and hiking. Make sure to double-check the regulations before you visit to ensure that you are following all safety protocols.

3. Look for land near popular attractions – If you’re looking for a place to camp or hike, try searching for BLM land close to popular attractions, such as national parks or monuments. Many of these areas have plenty of public land available for recreation and exploration.

4. Consult maps – The BLM provides detailed maps that show the boundaries of each parcel of land it manages. You can use these maps to find out exactly what type of land is available in your area, as well as the best ways to access it.

5. Consider other public land – In addition to BLM-managed land, there may be other types of public land available in your area. State parks, national forests, and wildlife refuges are all great places for camping, hiking, fishing, and more. Look into what’s available near you and how to access it.

6. Contact your local BLM office – If you have questions or need help finding the right spot, consider contacting your local Bureau of Land Management office. They can provide detailed information on what types of land are available in your area and how to access them.

7. Explore safely – BLM land, like any other public space, requires responsible use. Make sure to familiarize yourself with the rules and regulations of the area before venturing out so that you can enjoy your adventure safely. You may also need a permit or license if you plan on hunting or camping on BLM land, so make sure to look into that beforehand as well.

History of The Bureau of Land Management

The Bureau of Land Management (BLM) is a United States federal government agency responsible for managing public land, mineral resources, and natural resources. It was created by Congress in 1946 to oversee and manage the nation’s vast lands and resources.

The BLM is divided into ten geographic regions with headquarters located in Washington, D.C., and state offices located across the country. The mission of the BLM is to sustainably manage public lands for multiple uses such as energy production, recreation, grazing, timber harvesting, conservation, and habitat protection.

Since its inception in 1946, the BLM has been a leader in developing innovative ideas to ensure that America’s public lands are managed responsibly. By using modern technologies to properly monitor and manage public lands, the BLM protects these important resources while also allowing for their use in a variety of ways.

The BLM is committed to preserving America’s natural heritage by actively managing, protecting, and conserving wildlife habitat, wilderness areas, and recreational sites. In addition to its commitment to conservation, the BLM has also taken steps to ensure it meets its mission of providing economic stability through energy production and other job-creating activities.

Today, more than 250 million acres of public land are managed by the Bureau of Land Management. This includes national parks and monuments, forests and woodlands, grasslands and rangelands, watersheds and wetlands, oceans and coasts, wild horses and burros — all providing important natural resources for all citizens.

The BLM’s history dates back to the 1800s, when it was first created as part of the Department of the Interior in 1849. Initially, its primary purpose was to manage public lands and promote settlement across the western United States. In 1976, Congress passed the Federal Land Policy and Management Act (FLPMA), which established permanent protection for most public lands and set policy guidelines for their management by the BLM.

Today, the Bureau of Land Management’s mission is to sustainably manage its public lands on behalf of present and future generations. Its activities focus on energy development, wildlife conservation, grazing permits, timber harvesting, outdoor recreation opportunities, mineral development and archaeological sites. The bureau also works to restore and protect natural ecosystems, enhances public access to lands and waters, supports local economies, and creates opportunities for collaboration between government entities and the public.

The BLM is responsible for managing more than 245 million acres of land, as well as 700 million acres of subsurface minerals across the western United States. It also manages an additional 4 million acres of national forest system lands managed cooperatively by other agencies. The BLM’s responsibilities include: protecting cultural resources; managing endangered species; conserving water resources; protecting wilderness areas; managing grazing permits; regulating energy development; controlling wildfires; monitoring air quality; cleaning up hazardous waste sites; restoring damaged ecosystems; and providing recreation opportunities for Americans.

In order to accomplish its mission, the BLM works closely with other federal, state, and local agencies to ensure that land management decisions are made in an informed and collaborative manner. The BLM also relies on public input to help shape land management policy.

Creating a Water Catchment System

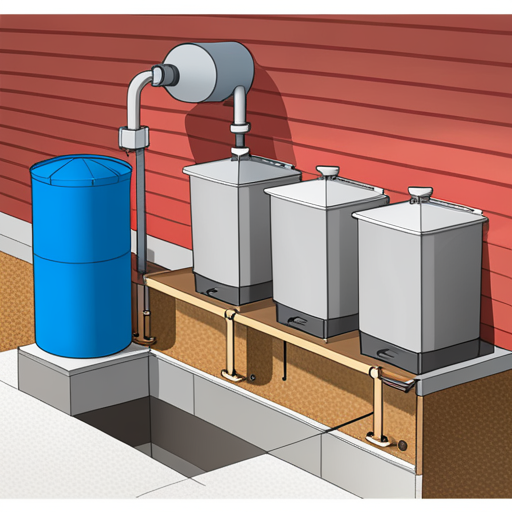
Creating a water catchment system can be an excellent way to make the most out of rainfall. Not only does it capture and store rainwater, but it also reduces runoff, filters pollutants, and helps to conserve water resources. It is important to take into account local regulations when designing your own water catchment system as many states have specific requirements for these systems.

Before you start building your water catchment system, you need to determine the size and shape of your roof or other collection surface that will be used to capture rainwater. You should also consider which materials are best for the purpose, including sheeting, gutters, drains and downspouts. It is important to make sure that all of these components are properly secured and sealed in order to prevent leakage.

Once the collection surface is ready, you will need to install a filter system to remove any debris or other contaminants from the water before it enters the storage container. This could involve anything from small mesh screens to large filtration systems depending on your needs. You might also want to install a pre-treatment system such as an ultraviolet light or ozone generator to further purify the water.

You will then need to decide which type of storage container is best for your needs. Options include tanks, barrels, and cisterns that can range from small sizes suitable for one person’s use to large capacity systems that can store thousands of gallons of water. Be sure to choose a container that is designed for potable water and check for any required certifications depending on your location.

It’s important to note that the storage container should be properly sealed or covered to keep out debris, insects, and other contaminants. Additionally, you should check for proper drainage in the area around your container and ensure that it is placed on a stable, level surface.

Once you have your storage system in place, you can begin to think about catching rainwater. You will need some materials such as gutters, downspouts, and piping to transport the water into the container. Make sure that all of these materials are of the highest quality and that they meet your local building codes. Additionally, if you’re using a tank to store the water, it needs to be made of food-grade material in order to ensure that it is safe for drinking.

Finally, you need to think about how you will filter the water before using it. Depending on your needs, you may want to install an inline filter the or a sediment filter. For size the most part, these of filters will remove large particles like dirt and debris that could your otherwise clog up the system. system If you plan on, using the you water for may drinking need purposes to, it install is a wise filter to for use a large carbon block particles filter in or order to sediment make sure that any potential. contaminants are removed. This could include harmful chemicals, bacteria, and other microorganisms. You may also want to consider adding a UV filter if you live in an area that has the potential for contamination from sewage runoff or agricultural runoffs.

Overall, creating a water catchment system is not overly complex and can be done by anyone with some basic tools and supplies. With some planning and research, you can easily set up a system that will provide clean, safe drinking water for your family’s needs. Plus, these systems can be designed to last for years with minimal maintenance. So if you’re looking to become more self-sustainable and reduce your reliance on municipal water sources, this is an excellent option to consider.

When setting up your system, make sure you research local laws and regulations regarding water collection and usage and be sure to obtain any permits or licenses that may be needed. Additionally, it is important to inspect the area around your catchment system regularly for contamination from outside sources. Finally, be sure that your catchment system is properly sealed to avoid any contamination or overflow from the tank.

If you’re ready to get started, here’s a step-by-step guide for creating your own water catchment system:

Step 1: Choose an area with good drainage and soil that is free of contaminants. If you have an area on your property that is already sloped for drainage, this can help minimize the amount of excavation required.

Step 2: Once you have chosen a location, it’s time to begin digging and laying down the foundations for your system. Depending on the size of your catchment system, you may need professional assistance. UV filter will help reduce any potential bacteria, algae and viruses from entering your water.

Once you have all the necessary components in place, it’s time to start collecting and storing your rainwater! Depending on the size of your system, you will need a large container or barrel for storage. If you are opting for a larger system that includes an overflow pipe, you will also need a rain barrel or above ground storage tank.

Lastly, it is important to monitor the water quality of your system. It is recommended to test for levels of PH, nitrates and bacterias that can contaminate stored water. If these levels are too high, then certain treatments will need to be implemented before drinking or using the water.

Lastly, you need to make sure your catchment system is properly maintained. This includes cleaning out debris and sediment that accumulates in storage tanks or barrels, as well as regularly checking the overflow pipe for any blockages or leaks. With regular maintenance and proper care, a water catchment system can be a great way to store and use water efficiently.

Overall, a good catchment system should be designed for the specific climate and landscape of your home. By considering all the aspects of design, location and maintenance, you can create a reliable system that will provide clean water for years to come.

Once your catchment system is set up, it’s important to keep it in good condition. This means ensuring that the tanks and barrels are tightly sealed to avoid leaking or contamination of the stored water. It’s also a good idea to check for any algae or other contaminants that might have found their way into the system. Regularly cleaning and maintaining the catchment system should help to ensure that it continues to function properly.

It’s also important to keep an eye on the quality of your stored water. If you don’t already have one, consider installing a filtration system in order to better monitor the quality of your water. Additionally, it’s a good idea to have your water tested regularly by a professional to ensure that it is safe for use.

The Many Uses of Paracord

Paracord is an invaluable tool for any hiker or camper. It can be used for a wide variety of applications, from tying up food and gear to building shelters. Here are some of the best ways that paracord can be used while out in the wild:

1. To tie up food – Animals such as bears can be attracted by the smell of food, so it’s important to keep all edibles securely stored away in a tree or other elevated location. Paracord makes this easy; simply tie the cord around your food bag and sling it over a branch.

2. As an emergency rope – Paracord is incredibly strong and lightweight, making it the perfect choice for a variety of different applications. Should you get into a sticky situation such as needing to cross a stream or climb up an unfamiliar mountain, paracord is an ideal rope for the job.

3. To secure your tent – If there are no trees or poles available to tie your tent down with, paracord is the ideal solution. Simply wrap some lengths of it around your tent pegs and you’ll be all set for a night in the wilderness.

4. To hang a tarp or groundsheet – For those heading off camping, setting up a tarp or groundsheet to protect against rain or dew is a must. Again, paracord is the perfect solution since it won’t break or stretch and can be easily tied to trees, rocks, pegs, and other surfaces.

5. To hang food – When camping in bear-prone areas, it’s important to keep all of your food stored safely away from wildlife. Paracord makes the perfect food-hanging line since it’s strong enough to hold a heavy load and can be secured high off the ground, away from curious noses.

6. To hang clothes or towels – Whether you’re at base camp or on the trail, having somewhere to dry your wet clothes is a must. Paracord comes in handy here too since it can be easily pulled between two trees or other objects and used to hang clothes while they dry.

7. To repair gear – Whether its broken buckles on your pack, damaged straps on your tent, or frayed laces on your hiking boots, paracord can be used to repair the damage and get you back on the trail. It can also make great emergency repairs for poles, paddles or even broken tools.

8. To build shelter – Everyone knows that paracord is essential for setting up a tent but it’s also useful for constructing other types of shelter such as A-frame shelters, tarps or even hammock hangers.

9. To mark a trail – Whether you’re hiking during the day or night, paracord can be used to clearly mark trails and help you stay on track.

10. As an emergency tourniquet – Paracord is strong enough to act as an impromptu tourniquet if you ever find yourself in an emergency situation or injured while out on the trail.

12. As a makeshift clothesline – If you need to dry out clothing or other items while camping, paracord can be used as a makeshift clothesline in combination with sticks and rocks.

13. To make repairs – Paracord is also incredibly useful for making repairs out on the trail and can come in handy if your gear breaks or needs some attention. It can be used to repair tent poles, straps on backpacks and more.

14. As an emergency shelter – If you’re ever caught in a situation where you need to make an impromptu shelter, paracord can help with that too! Use it to string up a tarp or blanket between two trees for an emergency shelter.

15. As an emergency whistle – If you’re ever in an emergency situation, it can be helpful to have a whistle with you to alert people of your location and get help quickly. Take some paracord and tie two small knots in one end, then blow into the other end. This can be used as an emergency whistle in a pinch.

17. As fire-starters – Paracord is made of nylon, which means it has some flammable properties and can be used as a fire starter in the outdoors. Tie two pieces together or use one long strand to create an “arm” so you can lean it against a piece of wood or other tinder to start a fire.

Oil Skin Jackets & Dusters for Waterproof Clothing

Oil skin jackets are a great way to keep you comfortable and dry even in the worst weather. With many different types of oil skin fabrics available, you can find the perfect fit for your needs. Oil skin jackets are made from fabric that’s been waterproofed through special treatment, making them resistant to water and other elements. This means that you can stay warm and dry in the rain or out on the boat without worrying about getting wet or cold.

The oil skin fabric of these jackets is also extremely durable and long-lasting, so you don’t have to worry about it wearing down after a few uses. This makes them perfect for outdoor activities, such as fishing, camping, or hiking. The material is also lightweight and breathable, so you won’t feel weighed down or sweaty when wearing one of these jackets.

The waterproofing abilities of oil skin jackets are unparalleled. With a special treatment process that seals out moisture and wind, these jackets will keep you dry and warm even in the harshest of conditions. The oilskin fabric is also incredibly breathable, so you won’t feel stuffy or uncomfortable in your jacket even when it’s raining.

These jackets come in a variety of styles and colors to fit any activity or occasion. Whether you need something casual for everyday use or something more rugged for outdoor activities, oil skin jackets can handle the job. They’re also designed to be lightweight and comfortable to wear without sacrificing on quality or durability.

If you’re looking for a jacket that will keep you dry and warm in all kinds of weather, then an oilskin jacket is a great choice. With its superior waterproofing capabilities, you won’t have to worry about getting wet or cold in the rain. The material is naturally waterproof and windproof, so your jacket will protect you from any kind of precipitation that comes your way. It also has a special wax coating that further helps keep out moisture and wind.

In addition to keeping you dry, oilskin jackets also have breathability. They are designed to let air circulate within the jacket, allowing your sweat to evaporate and helping you remain comfortable while outdoors. The fabric is also lightweight and flexible, making it easy for you to move around freely without feeling constrained or weighed down by your outerwear.

But perhaps the best part of oilskin jackets is that they are incredibly durable. They can withstand heavy wear and tear, so you know that your jacket will last for years to come. The fabric also resists fading, meaning it will look as good as new even after prolonged exposure to the elements.

Overall, an oil skin jacket is a great choice for anyone who wants to stay dry and comfortable while still being fashionable. They provide much-needed protection from the elements in a style that is both elegant and functional. With proper wear, an oil skin jacket can last for years, allowing you to enjoy its waterproofing benefits with ease.

With all of its advantages, it’s no wonder why so many people are choosing oil skin jackets as their go-to outerwear. So why not try out an oil skin jacket for yourself? You won’t regret it!

One thing to keep in mind is that oil skin jackets should be hosed off when dirty, never put in the washer or washed with soap. This can remove the waterproof wax layer.