How to Make Your Own Camping Knife

Making your own knife can be a rewarding and fulfilling experience. It takes patience, skill, and creativity to create a well-crafted blade. In this article, we’ll cover the basics of making a knife from scratch.

First, you’ll need to decide what type of steel you want to use for your blade. Common steel choices for knife-making include carbon steel, stainless steel, and tool steel. Each type of steel has its own advantages and disadvantages, so it’s important to do the research and decide which is right for you.

Next, you’ll need to measure and cut out the blade shape. You can use a blade template or make your own outline with a marker. Use a saw to cut it out and then file down the edges until you have the desired shape. You can also use an angle grinder to get into tight corners or create curved shapes.

Once you have the basic shape, it’s time to heat-treat your blade. Heat-treating adds strength and durability to the metal, which is necessary for a quality knife. You’ll need to follow the instructions for your particular type of steel when heat-treating.

Now it’s time to sharpen and polish your blade. Use an appropriate sharpening stone and water or oil to sharpen it and then use a fine-grade steel wool or polishing compound to buff the blade. Be sure to keep your knife clean throughout this process as any dirt or debris can ruin the finish and cause rusting.

Finally, you need to attach a handle if you want your knife to be useful. You can purchase a pre-made handle or you can make your own. If you decide to make your own handle, consider the type of material that will give a comfortable grip and will be strong enough to withstand heavy use. Once you’ve attached the handle, test it out by cutting through several materials to see how well it performs and if there are any areas you need to adjust.

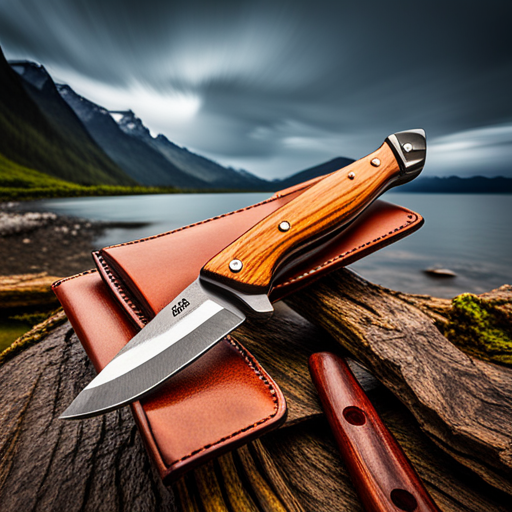
Now all that’s left is to sharpen your knife and enjoy your new creation! If you’re feeling ambitious, you could even try creating a custom sheath for your knife. With the right materials and attention to detail, you can create a unique and useful tool that will last for years! With a little bit of know-how, some tools, and the right materials, anyone can make their own knife.

Different Types of Steel

When it comes to making a good knife, the type of steel used is incredibly important. There are numerous types of steel available for knife makers, each with its own unique qualities and advantages. Here we’ll discuss which type of steel makes the best knives and what characteristics to look for when choosing one.

High carbon steels are some of the most popular choices among knife makers due to their durability and strength. They can be hardened easily, which means they stand up well against wear and tear. The downside is that they can rust if not cared for properly, so they need regular maintenance such as oiling or regular cleaning. Some examples of high carbon steels include 1095, 5160, and O1.

Stainless steels are also popular among knife makers due to their corrosion-resistant properties. They hold up better in moist environments, making them ideal for kitchen knives. However, they’re not as hard or durable as high carbon steels and require more frequent sharpening. Common stainless steel options include 420HC, AUS-8, VG10, and 154CM.

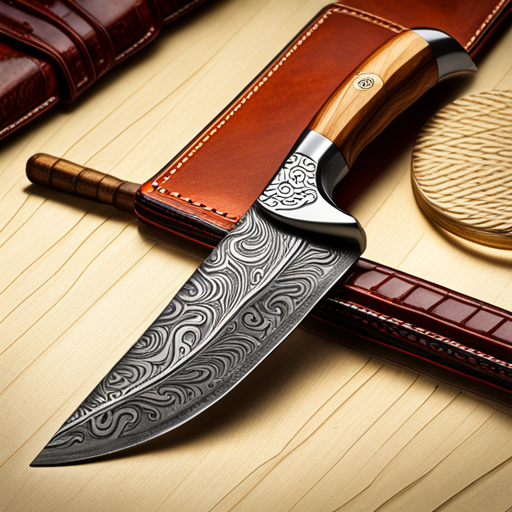
Damascus steel is a type of steel created by folding two different types of metal together before forging it into shape. This creates a layered pattern on the surface which makes Damascus steel visually stunning. It’s not only beautiful but also incredibly strong and often used for chef knives and pocket knives.

Tool steels have been specially designed for use in tools such as knives, which require a high level of durability. They’re usually made from mixtures of iron and other metals such as chromium or tungsten, which makes them harder and more resistant to wear and tear than regular steel. Common tool steels include A2, D2, O1, and M2.

High carbon steel is an alloy that contains more carbon than low carbon steel. This extra carbon gives it excellent hardness and strength, making it ideal for making blades that need to hold an edge well. Common high carbon steels are 1095, 5160, 1084, O1, and W2.

No matter what type of steel you choose for your knife blade, be sure to do your research to make sure you’re getting the right type for your application. Different types of steel have different advantages and drawbacks, so it pays to be informed before making your purchase. Consider factors such as blade hardness, corrosion resistance, edge retention, and maintenance requirements when deciding which type of steel is best for you. With careful consideration, you can find the perfect knife steel that meets all your needs.

No matter what kind of knife you’re looking for—whether a chef’s knife or hunting knife—you can be sure that there’s a suitable high-quality steel out there to meet your needs. With the right information and care, you can rest assured that your knife will last many years and serve you faithfully.

Below are some of the most popular types of steel used for making knives, and a brief overview of their characteristics:

Carbon Steel – Carbon steel is an alloy made up primarily of iron and carbon. It’s extremely hard and durable, making it ideal for heavy-duty tasks such as butchering or splitting wood. However, carbon steel is also prone to corrosion if not properly maintained, so it’s important to clean the blade after every use and oil it regularly.

Stainless Steel – Stainless steel is an alloy composed mostly of chromium and iron. It offers good resistance to corrosion but isn’t quite as hard as carbon steel, so it may require more frequent sharpening. It’s also more expensive than carbon steel, but it will last longer with proper care.

High Carbon Stainless Steel – High-carbon stainless steel is a combination of both carbon and stainless steel, making it extremely durable and corrosion resistant. It’s often used in high-end kitchen knives due to its strength and performance. It can be slightly more difficult to sharpen than other types of steel, but its long-lasting durability makes it worth the extra effort.

Tool Steel – Tool steels are a type of high-performance alloy that’s specifically designed for use in tools such as knives or chisels. They offer excellent wear resistance and edge retention, making them perfect for tasks that require precision and accuracy. They can be made from either carbon steel or stainless steel, but the most common type of tool steel is a combination of both.

Is Damascus Steel worth the Price?

Damascus steel is widely regarded as one of the best materials for the craft of knifemaking. It has a long, storied tradition and is known for its strength, durability, and beautiful patterned designs. But before you commit to using Damascus steel in your project, it’s important to consider both the advantages and disadvantages of this material.

The first advantage of Damascus steel is its strength and durability. This type of steel is renowned for how well it holds an edge, making it a favorite choice among professional knifemakers. Additionally, because Damascus steel has been heat treated multiple times in different ways, it also has excellent wear resistance and can handle higher levels of stress than other types of steel.

The second advantage is its unique and beautiful patterns. Damascus steel has a visually appealing pattern of alternating light and dark bands, which are created during the forging process. Not only does this look great, but it also adds to the strength of the blade by providing a degree of flexibility and shock absorption.

However, Damascus steel does have some drawbacks. For one, it is expensive; the intricate forging process and the use of high-quality materials make it more expensive than other types of steel. Additionally, Damascus steel is difficult to sharpen because its hardness varies throughout the blade. This means that a honing rod may not be enough to sharpen the entire blade. A separate honing stone may be needed to ensure that the whole blade is sharpened equally. Finally, it is important to note that Damascus steel is not as hard as other types of steels used in knifemaking, so it does not hold an edge for very long and requires frequent sharpening.

Despite these challenges, Damascus steel offers many advantages. For starters, it is aesthetically pleasing; the complex patterns created by forging give this type of steel a unique look that adds to the overall beauty of a knife. In addition, Damascus steel is incredibly durable and can last for generations with proper care. It also has superior corrosion resistance, making it an excellent choice for knives that will be exposed to the elements. Finally, Damascus steel is a great option for custom knifemakers who are looking to create one-of-a-kind pieces. The intricate patterns and beautiful colors can’t be replicated with other types of steel, making Damascus steel truly unique.

In short, Damascus steel has many advantages for knifemaking. However, there are some drawbacks to consider as well. For one thing, Damascus steel is often more expensive than other types of steel due to the amount of time and effort required to create it. Additionally, since each piece is unique, it can be difficult to find Damascus steel in large quantities, which can pose a problem for those looking to mass-produce knives.

Finally, some knifemakers may find it difficult or intimidating to work with Damascus steel due to the complexity and the need for specialized tools and techniques. However, with patience and practice, this type of steel can be mastered over time.

Starting a Camp Fire with a Lens or Bottle

Starting a fire with a lens or the bottom of a glass bottle is an age-old technique that has been used since ancient times. It’s surprisingly easy to do and can be done without any special tools or materials. Here are the steps you’ll need to follow to get your fire started:

1. Find a sunny spot and gather any dry kindling you can find. This could include wood shavings, leaves, or twigs.

2. Place the kindling in a pile in an area that’s sheltered from the wind. Make sure it’s not too close to anything flammable like trees or buildings.

3. Angle your lens (or the bottom of a glass bottle) so that sunlight is focused on the kindling. Keep adjusting the angle until you can see smoke rising from the pile.

4. Once you have created enough heat and smoke, carefully introduce some oxygen to your kindling by fanning with your hand or using a bellow. This will help ignite it.

5. Once the kindling is burning, gradually add larger pieces of wood to your fire until you have a nice and steady flame going.

6. Make sure to always be mindful of safety when setting up and tending your fire. Keep an eye on the flames at all times and make sure that your fire does not spread to any of the surrounding areas.

7. Another important safety tip is to keep a bucket full of water handy in case you need to put out the fire quickly for any reason.

8. Finally, once your fire is burning steadily and safely, enjoy some hot food or drinks over it! You can also make use of its light and warmth to complete other tasks or just savor the moment as you relax.

9. Whether you’re an experienced camper or simply looking for a new way to start a fire, using a lens or the bottom of a glass bottle is one of the most effective methods out there. With just a few simple steps, you can be sure to get a warm and crackling fire going in no time.

Now that you know this method, keep in mind that someone’s discarded glass bottle can inadvertently start a forest fire. It’s important to never litter, and to always use safe practices when camping. This includes not building campfires during times of drought, and always being mindful of where embers may be traveling.

Vanilla as a Natural Mosquito Repellant

Vanilla is known to be a sweet and fragrant scent, but did you know that it can also help keep mosquitoes away? Studies have shown that vanilla extract has been proven to be effective in keeping mosquitoes from biting. This natural insect repellent can easily be found at your local grocery store or online.

One way to use vanilla to repel mosquitoes is to apply a few drops of pure vanilla extract onto your skin. It may be best to avoid using the imitation or synthetic vanillas as they may not have the same effect. When applying, make sure you do it sparingly and don’t rub it in too much as this could cause irritation of your skin.

In addition to applying the extract directly onto your skin, you can also make an all-natural mosquito repellent using essential oils such as citronella and eucalyptus. All you need is a few drops of each oil combined with a tablespoon of vanilla extract. Mix them together and apply it on your skin with a cotton ball. Alternatively, you can also use these ingredients to create a spray by mixing them with water in a spray bottle and spraying it on your skin as needed.

Using vanilla extract or a mixture of essential oils and vanilla extract is an effective way to help ward off mosquitoes naturally without relying on chemical based repellents. However, it is important to take the necessary precautions when using essential oils and vanilla extract on your skin as they can cause irritation. If you experience any itching or redness, discontinue use immediately. Additionally, it is best to avoid areas with excessive mosquito activity. By taking these extra steps, you can enjoy a pleasant summer without too much worry about pesky mosquitoes.

Common Tick Repellants

Ticks are small, parasitic arthropods that feed on the blood of animals and humans. They can transmit serious diseases such as Lyme disease, Rocky Mountain spotted fever, and tularemia. As such, it is important to take steps to repel them from your yard and body.

There are a number of commercial tick repellants available on the market. Most are made with Deet, a synthetic chemical compound used to repel insects. It works by masking scents that attract ticks, and it can be found in lotions, sprays, and wipes. However, Deet should not be used on children under the age of two months or pets due to the risk of toxicity.

In addition to chemical repellants, there are also natural products that can be used for tick prevention. Products containing essential oils such as lavender, peppermint, and eucalyptus are popular choices. These oils may help mask scents that ticks use to find hosts and are generally considered safe when used correctly. However, they must be reapplied more often than chemical repellants, and some people may experience skin irritation when using them.

Another natural option is to create a homemade tick repellant out of garlic powder or vinegar. Sprinkling garlic powder around the perimeter of your yard can help deter ticks from entering. As for vinegar, applying it directly to the skin is believed to be effective in keeping ticks away. Though there isn’t any scientific evidence to back up these claims, many people have found success with using garlic powder and vinegar.

Finally, certain plants can also help keep ticks away. Planting marigolds around the perimeter of your yard may help repel ticks. Citronella and lavender are also known to have repellent properties, so planting these near potential tick entry points in your yard could help reduce their presence.

Overall, there are a variety of different methods you can use to help repel ticks. Depending on your preferences, you might want to opt for natural remedies such as plants or essential oils, or you may prefer to use more traditional treatments like insecticides. Whichever option you choose, taking the proper precautions can help keep ticks away from your property.

Remember, when dealing with ticks it’s important to take extra precaution and always consult a doctor if you are bitten by one. While using these repellants can help reduce the likelihood of being bitten, it’s not a guarantee that you will be completely safe. By staying informed and taking the right preventative measures, you can help keep yourself and your family safe from ticks.

The key to successfully repelling ticks is to take the necessary precautions and be aware of your surroundings. Remember to check for ticks frequently, wear the right clothing, and utilize tick repellants appropriately. By doing so, you can help reduce your chances of getting bitten by ticks and make sure that your family stays safe.

If you have any further questions about tick repellents or controlling ticks in general, consult a professional. With the right information and guidance, you can protect yourself from ticks and other pests so that you and your family can enjoy outdoor activities without worrying about tick bites.

Tick repellants are an important part of controlling the spread of disease-carrying ticks in your area. By staying informed and taking proper precautions, you can protect yourself and your family from tick-borne illnesses.

To summarize, tick repellants are an important way to reduce the chances of getting bitten by ticks. They should be used in combination with other measures such as wearing protective clothing, avoiding dense vegetation, checking for ticks after outdoor activities, and consulting a professional if necessary. Various types of repellants are available, including sprays, lotions, and granular products. It is important to read the label carefully and follow the directions for safe use. With careful research and application, you can protect yourself from tick bites and enjoy outdoor activities without worry.

Sprays are the most common form of tick repellant, and they typically contain DEET or permethrin. DEET is effective against ticks, but it can cause skin irritation in some people. Since DEET can also be toxic if ingested, it should not be applied to children’s faces or hands. Permethrin is a synthetic form of pyrethrin, a compound derived from chrysanthemums. It is highly effective against ticks and other insects but can cause serious reactions in cats and should not be used on them.

Lotions are another common form of tick repellent, usually containing DEET or permethrin. They are less likely to cause skin irritation than sprays and are effective for several hours. Natural repellents containing lemon eucalyptus oil or citronella oil can be used as well, but they may not provide the same protection from ticks as DEET or permethrin.

Wearing long sleeves and pants when outdoors can also help keep ticks away. Tucking pant legs into socks and taping cuffs can further reduce the risk of tick bites. Light colors are also beneficial as they make ticks more visible and easier to remove if they do latch on.

Finally, checking for ticks after spending time outdoors is essential in preventing tick-borne illnesses. It’s important to note that ticks often attach in out-of-the-way places, such as the armpits, groin, or scalp. If a tick is found, it should be removed as soon as possible to reduce the risk of disease transmission. The Centers for Disease Control and Prevention (CDC) recommends using tweezers to firmly grasp and remove the tick close to the skin. After removal, it’s important to clean the area with soap and water or rubbing alcohol. Finally, it is best to dispose of a tick by putting it in alcohol or flushing it down the toilet.

By applying these strategies, people can dramatically reduce their risk of getting bitten by ticks and prevent contracting serious illnesses. Aside from practicing good personal hygiene, there are a number of other strategies that can be used to help reduce tick exposure.

Peppermint Oil

Peppermint oil is an effective tick repellant because of its strong aroma. The scent of peppermint oil repels ticks by masking the odors that attract them in the first place. In addition, peppermint oil is a natural insecticide and has been found to be very effective at killing ticks on contact.

To use peppermint oil as a tick repellant, it needs to be diluted in water or other carrier oils and applied directly to the skin. This should be done carefully, avoiding contact with eyes and mouth. It is important not to apply too much peppermint oil, as this can cause irritation or even an allergic reaction. When using on children or pets, it is best to consult a doctor or veterinarian first.

The effects of peppermint oil as a tick repellent can last for several hours, but reapplication may be necessary depending on the length and intensity of outdoor activities. To get the most out of its effect, it is recommended to apply the diluted peppermint oil mixture to the skin prior to going outdoors, and then apply it as often as needed.

So why does peppermint oil work so well? According to studies, the menthol contained in peppermint has been found to be a natural insect repellent. In particular, ticks have an aversion to this scent, which is why it is used as a repellent.

Also, the smell of peppermint oil is not as strong as many other chemical tick repellents, so it can be used in areas where chemical sprays are not allowed. Additionally, because it does not contain any harsh or unnatural chemicals, it is much safer for humans and animals to use than chemical insecticides.

Finally, peppermint oil is relatively inexpensive and easy to obtain. You can find it in health food stores or online, and it can be used both indoors and outdoors. Its convenience makes it an ideal choice for those looking for a natural way to repel ticks without using harsh chemicals.

Peppermint oil is an effective, affordable, and safe way to repel ticks. It is a natural alternative for those who want to avoid using chemical insecticides in their home or yard. With its pleasant scent and ease of application, it can be an excellent choice for protecting your family from dangerous tick bites.

How to Waterproof a Tent

Waterproofing a tent is an important step to ensuring that your camping trips are free from the worries of leaks and wet floors. Fortunately, there are several options for waterproofing your tent so it can withstand even the wettest conditions.

The most common way to waterproof a tent is by applying a specific product designed specifically for treating tent fabric. These products come in both a spray and liquid form, and can be applied to both the outside and inside of the tent. It is important to ensure that the fabric is completely saturated with the product so that it forms an effective barrier against water ingress.

Another option for waterproofing your tent is to apply a sealant directly to the seams. Seam sealants are usually available in a wax or liquid form and can be used to waterproof any areas where fabric pieces meet such as around zippers, pockets, and vents. Applying seam sealant is a more labor-intensive process than using tent treatment products but it does provide an extra layer of protection against water leakage.

Before waterproofing your tent, it’s important to make sure the fabric and seams are clean. This will allow the waterproof solution to penetrate more easily into the material. Some tent fabrics may require a special cleaner or conditioner before treating with a waterproofer, so be sure to read and follow all directions on any product used.

Once the fabric is clean and dry, it’s time to waterproof the tent. Tent treatments are designed to be applied as a spray or in liquid form. Spray-on products generally require multiple applications for optimal performance, while liquids often provide better protection with one application. Follow all directions provided on the product packaging for best results.

When applying the waterproofing solution, make sure to cover all seams and surfaces of the tent so that no gaps in protection are left. It’s also important to check for any holes or thin spots in the fabric before treating it with the waterproofer. These areas can be patched using a product designed specifically for this purpose.

Once applied, allow the waterproofing solution to dry completely before packing away the tent. This ensures that all of the seams and surfaces are properly protected from water damage. With regular applications, your tent should be able to withstand wet weather for years to come.

It’s also important to make sure that your tent is stored in a dry place when not in use. If any moisture is left on the fabric, mildew and mold can form, and the waterproofing solution will be less effective. Additionally, it’s best to avoid storing your tent near potential sources of heat such as vents or radiators. Doing so can cause the material to break down more quickly.

Once you’re ready to use your tent, make sure to inspect it for any defects or holes prior to setting it up and using it in wet weather conditions. If the waterproofing has worn off due to extended use or improper storage, you may need to reapply a fresh layer of coats before heading out on your next camping trip.

Finally, it’s important to keep in mind that even the most well-made and waterproof tents can only do so much when exposed to extreme weather conditions. Always check the forecast before heading out for a camping trip and be prepared with an alternative plan in case of inclement weather or other dangerous situations. With these tips in mind, you’ll be sure to keep your tent dry and cozy during all of your outdoor adventures.

Hypothermia

Hypothermia occurs when the body’s core temperature drops below 95°F (35°C). It is a life-threatening emergency and requires immediate medical attention. Signs of hypothermia include shivering, confusion, slurred speech, shallow breathing, fatigue, and pale skin. If not treated immediately, hypothermia can lead to death.

To treat hypothermia, the affected person must be moved to a warm environment and their body temperature must be slowly raised. It is important to protect the person from further heat loss by covering them with blankets or clothing. If available, an electric blanket should be used to provide additional warmth and comfort.

It is also necessary to monitor the individual’s body temperature and breathing every 10-15 minutes. A thermometer can be used to check their temperature. If the person is not responding, CPR should be administered to keep oxygen circulating in the body until medical help arrives.

Finally, any wet clothing should be removed and replaced with warm, dry clothes. It is important to keep the person’s body covered as much as possible. If the person is conscious, they should be encouraged to drink warm fluids (water or broth) and eat high-calorie food.

If a person with hypothermia is not treated immediately, it could lead to serious complications such as organ failure, heart attack, respiratory arrest, coma, or even death. Thus, it is important to be aware of the signs and take quick action when recognizing hypothermia in order to prevent more serious consequences. By recognizing the symptoms, knowing how to properly respond, and providing immediate medical assistance when needed, a person can quickly recover from hypothermia and avoid any further complications.

First, it is essential to know the signs and symptoms of hypothermia. Generally speaking, when a person’s body temperature falls below 95 degrees Fahrenheit (35 degrees Celsius), they are considered to have hypothermia. Symptoms may include confusion, shivering or uncontrollable shaking, difficulty walking/speaking, pale skin, fatigue, and feeling cold.

The best way to treat hypothermia is to move the person out of the cold environment as quickly as possible, and then begin providing warm clothing or blankets. In addition, warm drinks (avoid alcohol or caffeinated beverages) can help increase a person’s body temperature. If symptoms are severe enough that the person is unable to move, seek medical attention immediately as hypothermia can be life-threatening.

In order to prevent hypothermia, it’s important to dress appropriately for the weather and limit outdoor activity during cold temperatures. Additionally, if you plan on going outdoors in cold temperatures it’s important to wear multiple layers of lightweight clothing that traps body heat. When it’s very cold outside, try to stay indoors as much as possible and keep your indoor space warm with a thermostat-controlled heater.

If you are caring for elderly individuals or young children, pay extra attention to signs of hypothermia as they are more vulnerable to cold temperatures than other age groups. The signs and symptoms of hypothermia include feeling very cold or shivering, feeling sleepy or confused, lack of coordination, slurred speech, shallow breathing and a slow heart rate.

If you suspect that someone is showing signs of hypothermia it’s important to move them somewhere warm as soon as possible. If the person is conscious, have them drink warm beverages, like tea or hot chocolate and wrap them in blankets. Try to remove any wet clothing they may be wearing and replace them with dry clothes.

If the person seems unresponsive or unconscious seek medical attention immediately. Before you take the person to the hospital, try to warm them up slowly using body heat, covering them with blankets or towels and placing hot water bottles around their neck, chest and groin area.

It’s important to make sure the person is monitored closely until they are at a safe temperature. A doctor will be able to assess the individual more thoroughly and provide further treatment if necessary.

If you’re outdoors in cold weather, always dress appropriately, and keep yourself dry. Take frequent breaks from the cold and warm up indoors wherever possible. If you have any symptoms of hypothermia, seek medical attention immediately. Prevention is always better than cure!

Hypothermia can be a serious condition and it is important to act quickly if someone you know may be at risk. Taking the right steps to warm them up and monitor their temperature can save that person’s life. If you think someone is suffering from hypothermia, seek medical attention as soon as possible.

Folding Knives Vs. Fixed Blade

When it comes to hunting and camping, folding knives and fixed blade knives are two of the most common types of blades used. Each type of knife has its own advantages and disadvantages which can make choosing the right one for your needs a difficult decision.

Folding knives have several distinct advantages over fixed blade knives. First, they are much more compact and easy to store, making them ideal for carrying on a camping or hunting trip. Folding knives also require less maintenance than their fixed blade counterparts, as the blade does not need to be sharpened as often. Finally, folding knives are generally less expensive than fixed blades.

However, there are some drawbacks to consider when choosing a folding knife. Folding knives tend to be less durable than fixed blade models, and the blades may not hold an edge for as long. The mechanisms on some folding knives can also wear out over time, making them more difficult to open and close.

Fixed blade knives are popular among hunters and campers due to their durability and strength. Fixed blades are designed to withstand more abuse than folding knives, making them a better choice for rugged activities like hunting and camping. The blades of fixed blade knives also remain sharper for a longer period of time, which makes them ideal for tasks that require precise cutting.

Overall, choosing between a folding knife and a fixed blade is largely dependent on the type of activities you’ll be using the knife for. If you plan to engage in light-duty tasks such as cutting rope or slicing vegetables, a folding knife may suffice. However, if you’re going to be engaging in tough outdoor activities like hunting and camping, a fixed blade is your best bet. Fixed blades are far more reliable when it comes to durability, strength and precision, all of which are important features when it comes to using knives in the outdoors. No matter which type you choose, make sure you select a knife that’s reliable, well-made and fit for purpose. This will ensure your knife can handle whatever task you throw at it.

Starting a Fire with a Bow Drill

Starting a fire using a bow drill is an ancient technique that has been used for centuries to make fire without the use of modern tools. It involves creating friction between a spindle and a bearing block, which creates enough heat to catch tinder on fire and eventually build up larger flames. Here’s how it works:

1. Select a flat piece of wood and create a V-shaped notch in it with your knife or other cutting tool. This will act as the hearth board, where the friction will take place to create heat.

2. Lay down the spindle—a long length of straight wood anywhere from 12-24 inches long—on top of the hearth board. The spindle should fit snugly in the V-notch and should be able to spin freely when you rotate it with your hands.

3. Place the bearing block, a soft piece of wood shaped like an arrowhead, on top of the spindle. This piece will bear down on the spindle and help create friction to generate heat.

4. Hold the bearing block in place with your hands, while you use a bow—a curved piece of wood or branch about two to three feet long—to rotate the spindle quickly between your palms. Keep rotating for several minutes until you start seeing smoke coming from the V-notch.

5. Once you see smoke, gently blow on the ember to further fan it and encourage more smoke. You can then move the ember onto a tinder bundle—a bundle of dry grass, leaves or bark that will ignite easily when exposed to heat.

6. Fan the ember with your breath or a feather to further increase its oxygen supply. When the tinder starts burning, you can add more fuel like thin twigs and small branches until you get a decent flame going.

7. Once the fire is established, use larger logs and pieces of wood to grow it. Make sure you keep adding fuel regularly so the fire continues to burn. It’s also important to keep tending the fire, making sure that it doesn’t spread too far or get too hot.

8. Congratulations! You have successfully started a fire using a bow drill. Now you can start enjoying the warmth and light of your own campfire or cooking food over the open flame. This is a valuable skill to have, whether in the wilderness or during an emergency.

9. When you are done using the fire, make sure that you extinguish it completely before leaving the area. Spread water over the embers and stir them around to ensure that they are out. Once everything has cooled down, you can go on your merry way.

10. With the right technique, materials and practice, starting a fire with a bow drill is an achievable goal. The process of creating your own flame is incredibly satisfying and useful when you are out in nature or in a crisis situation. Keep practicing this skill until it becomes second nature and you can start fires confidently and quickly.

Choosing The Right Axe

When you’re buying an axe, there are a few key things to consider. First, what type of material do you need? An axe made with steel is good for chopping wood and performing other heavy-duty tasks, while an aluminum or fiberglass handle makes for a lighter axe that’s better suited to smaller jobs.

Second, consider the blade size. A larger blade will have more power when chopping logs, but it may be too heavy for smaller tasks. Smaller blades are perfect for precision cutting and carving.

Third, think about the handle design. Straight handles offer more control and accuracy while curved handles are better for general-purpose use. For larger tasks, longer handles allow for more momentum and power when swinging.

Finally, consider the cost. A quality axe can be expensive, but it’s worth investing in a tool that will last for years to come. Look for an axe with a good warranty and look for reviews from other users before making your final purchase decision.

Ultimately, the right axe for the job is the one that feels most comfortable in your hands and can handle the task at hand. Keep all these factors in mind and you’ll be sure to find an axe that will serve you well for years to come.